1. 服务网关Gateway
API 网关出现的原因是微服务架构的出现,不同的微服务一般会有不同的网络地址,而外部客户端可能需要调用多个服务的接口才能完成一个业务需求,如果让客户端直接与各个微服务通信,会有以下的问题:
破坏了服务无状态特点。
为了保证对外服务的安全性,我们需要实现对服务访问的权限控制,而开放服务的权限控制机制将会贯穿并污染整个开放服务的业务逻辑,这会带来的最直接问题是,破坏了服务集群中REST API无状态的特点。
从具体开发和测试的角度来说,在工作中除了要考虑实际的业务逻辑之外,还需要额外考虑对接口访问的控制处理。无法直接复用既有接口。
当我们需要对一个即有的集群内访问接口,实现外部服务访问时,我们不得不通过在原有接口上增加校验逻辑,或增加一个代理调用来实现权限控制,无法直接复用原有的接口。
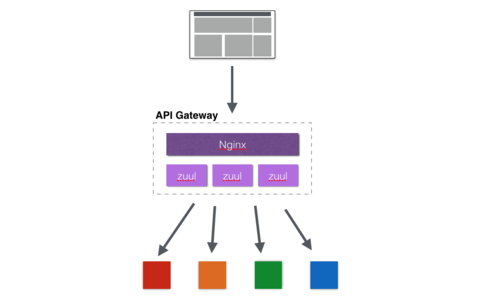
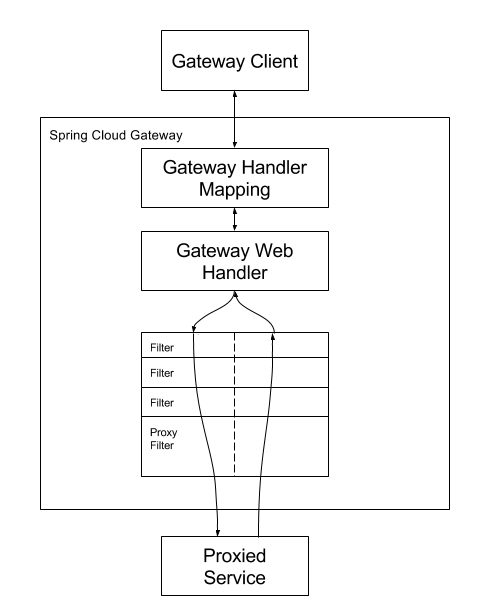
以上这些问题可以借助 API 网关解决。API 网关是介于客户端和服务器端之间的中间层,所有的外部请求都会先经过 API 网关这一层。也就是说,API 的实现方面更多的考虑业务逻辑,而安全、性能、监控可以交由 API 网关来做,这样既提高业务灵活性又不缺安全性,典型的架构图如图所示:
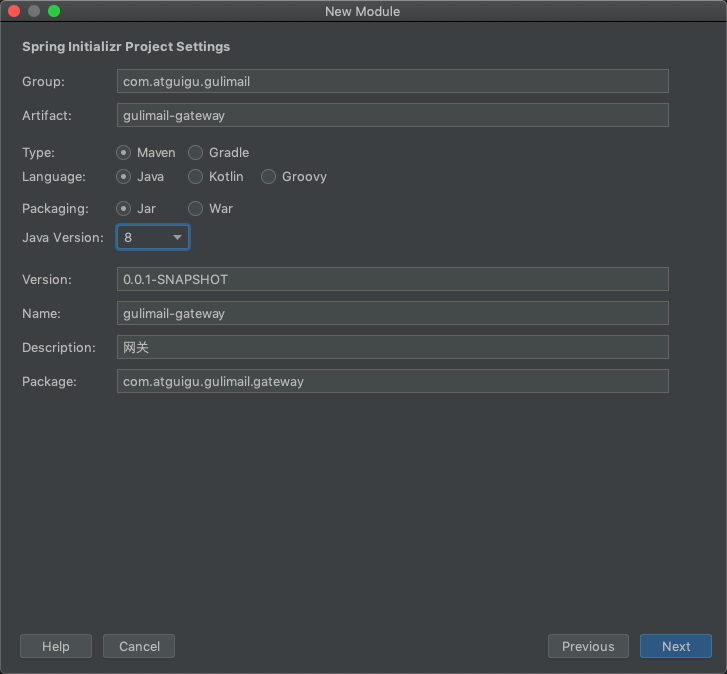
1.1. 快速开始
创建网关module:
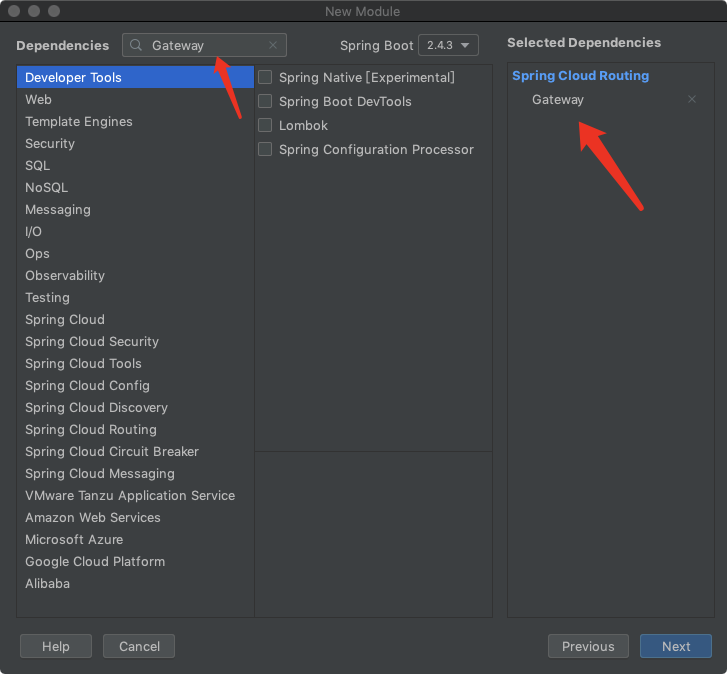
1.1.1. 引入依赖
已引入,如下。pom.xml中的依赖:
1 | <dependencies> |
1.1.2. 编写路由规则
为了演示路由到不同服务,这里把消费者和生产者都配置在网关中
application.yml
1 | server: |
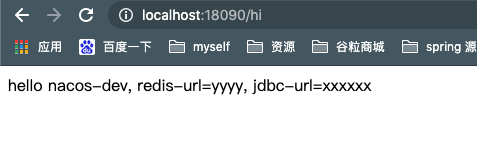
1.1.3. 启动测试
通过网关路径访问消费者或者生产者。
1.2. 路由规则详解
基本概念:
- Route:路由网关的基本构建块。它由ID,目的URI,断言(Predicate)集合和过滤器(filter)集合组成。如果断言聚合为真,则匹配该路由。
- Predicate:这是一个 Java 8函数式断言。允许开发人员匹配来自HTTP请求的任何内容,例如请求头或参数。
- 过滤器:可以在发送下游请求之前或之后修改请求和响应。
路由根据断言进行匹配,匹配成功就会转发请求给URI,在转发请求之前或者之后可以添加过滤器。
1.2.1. 断言工厂
Spring Cloud Gateway包含许多内置的Route Predicate工厂。所有这些断言都匹配HTTP请求的不同属性。多路由断言工厂通过and组合。
官方提供的路由工厂:
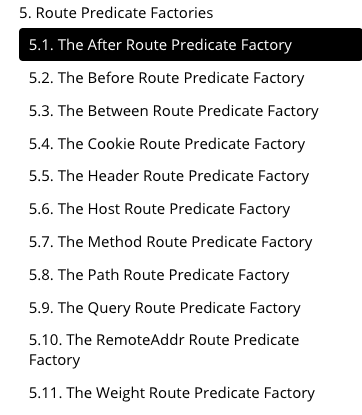
这些断言工厂的配置方式,参照官方文档:https://docs.spring.io/spring-cloud-gateway/docs/current/reference/html/#gateway-request-predicates-factories
这里重点掌握请求路径路由断言的配置方式:
1 | spring: |
这个路由匹配以/foo或者/bar开头的路径,转发到http:example.org。例如 /foo/1 or /foo/bar or /bar/baz.
1.2.2. 过滤器工厂
路由过滤器允许以某种方式修改传入的HTTP请求或传出的HTTP响应。路径过滤器的范围限定为特定路由。Spring Cloud Gateway包含许多内置的GatewayFilter工厂。
这些过滤器工厂的配置方式,同样参照官方文档:https://docs.spring.io/spring-cloud-gateway/docs/current/reference/html/#gatewayfilter-factories
过滤器 有 20 多个 实现类,根据过滤器工厂的用途来划分,可以分为以下几种:Header、Parameter、Path、Body、Status、Session、Redirect、Retry、RateLimiter和Hystrix
这里重点掌握PrefixPath GatewayFilter Factory:
1 | spring: |
这将在所有匹配请求的路径上加上/mypath前缀。因此,对/hello的请求将被发送到/mypath/hello。
RewritePath GatewayFilter factory 同样很有用:
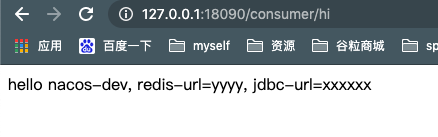
在开发中由于所有微服务的访问都要经过网关,为了区分不同的微服务,通常会在路径前加上一个标识,例如:访问服务提供方:http://localhost:18090/provider/hello ;访问服务消费方:http://localhost:18090/consumer/hi 如果不重写地址,直接转发的话,转发后的路径为:http://localhost:18070/provider/hello和http://localhost:18080/consumer/hi明显多了一个provider或者consumer,导致转发失败。
这时,我们就用上了路径重写,配置如下:
1 | server: |
注意:Path=/consumer/**及Path=/provider/**的变化
测试:
1.3. 面向服务的路由
如果要做到负载均衡,则必须把网关工程注册到nacos注册中心,然后通过服务名访问。
1.3.1. 把网关服务注册到nacos
引入nacos的相关依赖:
1
2
3
4
5
6
7
8
9
10
11
12
13
14
15
16
17
18
19
20
21
22
23
24
25
26
27
28
29
30<dependency>
<groupId>com.alibaba.cloud</groupId>
<artifactId>spring-cloud-starter-alibaba-nacos-discovery</artifactId>
</dependency>
<dependency>
<groupId>com.alibaba.cloud</groupId>
<artifactId>spring-cloud-starter-alibaba-nacos-config</artifactId>
</dependency>
<!-- SpringCloud的依赖 -->
<dependencyManagement>
<dependencies>
<dependency>
<groupId>org.springframework.cloud</groupId>
<artifactId>spring-cloud-dependencies</artifactId>
<version>Hoxton.SR2</version>
<type>pom</type>
<scope>import</scope>
</dependency>
<!-- 在依赖管理中加入springCloud-alibaba组件的依赖,注意和springcloud及springboot的版本依赖关系 -->
<dependency>
<groupId>com.alibaba.cloud</groupId>
<artifactId>spring-cloud-alibaba-dependencies</artifactId>
<version>2.1.0.RELEASE</version>
<type>pom</type>
<scope>import</scope>
</dependency>
</dependencies>
</dependencyManagement>配置nacos服务地址及服务名:
bootstrap.yml中的配置:
1
2
3
4
5
6
7spring:
application:
name: gateway-demo
cloud:
nacos:
config:
server-addr: 127.0.0.1:8848application.yml中的配置:
1
2
3
4
5
6
7
8
9
10
11
12
13
14
15
16
17
18
19
20
21server:
port: 18090
spring:
cloud:
nacos:
discovery:
server-addr: 127.0.0.1:8848
gateway:
routes:
- id: nacos-consumer
uri: http://127.0.0.1:7000
predicates:
- Path=/consumer/**
filters:
- RewritePath=/consumer/(?<segment>.*),/$\{segment}
- id: nacos-provider
uri: http://127.0.0.1:8000
predicates:
- Path=/provider/**
filters:
- RewritePath=/provider/(?<segment>.*),/$\{segment}把网关注入到nacos
1
2
3
4
5
6
7
8
9
public class GatewayDemoApplication {
public static void main(String[] args) {
SpringApplication.run(GatewayDemoApplication.class, args);
}
}
1.3.2. 修改配置,通过服务名路由
1 | server: |
语法:lb://服务名
lb:LoadBalance,代表负载均衡的方式
服务名取决于nacos的服务列表中的服务名
1.4. 路由的java代码配置方式(了解)
参见官方文档:https://spring.io/projects/spring-cloud-gateway
代码如下:
1 | @Bean |