java线程池 java创建线程的四种方式 继承Thread类 1 2 3 4 5 6 7 8 9 10 11 12 13 14 15 16 17 18 19 20 21 22 23 24 25 26 27 28 public class MyThread extends Thread @Override public void run () for (int i = 0 ; i < 5 ; i++) { System.out.println("i: " +i); } } public static void main (String[] args) new MyThread().run(); new MyThread().start(); } }
重写Runnable接口实现多线程 1 2 3 4 5 6 7 8 9 10 11 12 13 14 15 16 17 public class MyThread implements Runnable @Override public void run () for (int i = 0 ; i < 5 ; i++) { System.out.println("i: " +i); } } public static void main (String[] args) MyThread myThread = new MyThread(); Thread thread = new Thread(myThread); thread.start(); } }
重写Callable接口(不常用) 1 2 3 4 5 6 7 8 9 10 11 12 13 14 15 16 17 18 19 20 21 22 23 24 25 26 27 28 public class ThreadTest implements Callable <Integer > @Override public Integer call () throws Exception System.out.println("当前线程:" + Thread.currentThread().getName()); int i = 10 / 2 ; System.out.println("结果是:" + i); return i; } public static void main (String[] args) throws InterruptedException, ExecutionException System.out.println("main--start" ); Callable<Integer> callable = new ThreadTest(); FutureTask<Integer> futureTask = new FutureTask<Integer>(callable); Thread thread = new Thread(futureTask); thread.start(); Integer integer = futureTask.get(); System.out.println("线程返回的结果:" + integer); System.out.println("main--end." ); } }
通过线程池
使用线程池创建线程的优势:
降低资源消耗 。通过重复利用已创建的线程降低线程创建和销毁造成的消耗。提高响应速度 。当任务到达时,任务可以不需要的等到线程创建就能立即执行。提高线程的可管理性 。线程是稀缺资源,如果无限制的创建,会消耗系统资源,还会降低系统的稳定性
但是要做到合理的利用线程池,必须对其原理了如指掌。java可以通过Executors来创建线程池,它提供了5种线程池:
newFixedThreadPool:固定线程池大小,可控制线程最大并发数,超出的线程会在队列中等待
newSingleThreadExecutor:创建一个单线程化的线程池,它只会用唯一的工作线程来执行任务,保证所有任务按照指定顺序(FIFO, LIFO, 优先级)执行
newCachedThreadPool:可缓存线程池,如果线程池长度超过处理需要,可回收空闲线程,若无需回收,则新建线程
newScheduledThreadPool:创建一个定长线程池,支持定时(scheduleWithFixedDelay()函数的initdelay参数)及周期(delay 参数)任务执行
newWorkStealingPool:创建一个单线程化的支持定时的线程池,可以用一个线程周期性执行任务(比如周期7天,一次任务才用1小时,使用多线程就会浪费资源)
但是线程池最好不要使用Executors创建,最好通过ThreadPoolExecutor的方式手动创建,这样的处理方式让我们更加明确线程池的运行规则,规避资源耗尽的风险。
使用ThreadPoolExecutor创建线程池 (1)方法签名:
1 2 3 4 5 6 7 8 public ThreadPoolExecutor (int corePoolSize, int maximumPoolSize, long keepAliveTime, TimeUnit unit, BlockingQueue<Runnable> workQueue, ThreadFactory threadFactory, RejectedExecutionHandler handler)
(2)参数简介
corePoolSize 线程池核心池的大小
maximumPoolSize 线程池的最大线程数
keepAliveTime 当线程数大于核心时,此为终止前多余的空闲线程等待新任务的最长时间
unit keepAliveTime 的时间单位
workQueue 用来储存等待执行任务的队列
threadFactory 线程工厂
handler 拒绝策略
corePoolSize :当提交一个任务到线程池时,线程池会创建一个线程来执行任务,即使其他空闲的基本线程能够执行新任务也会创建线程,等到需要执行的任务数大于线程池基本大小时就不再创建。
maximumPoolSize :线程池允许创建的最大线程数。如果队列满了,并且已创建的线程数小于最大线程数,则线程池会再创建新的线程执行任务。(如果使用了无界队列,这个参数无效)
在创建了线程池后,线程池中并没有任何线程(默认),等到有任务来才创建线程去执行任务,除非调用了prestartAllCoreThreads()或者
prestartCoreThread()方法
keepAliveTime :线程池的工作线程空闲后,保持存活的时间。如果任务很多,并且每个任务执行的时间比较短,可以调大这个时间,提高线程的利用率
TimeUnit :可选的单位有天(DAYS),小时(HOURS),分钟(MINUTES),毫秒(MILLISECONDS),微秒(MICROSECONDS, 千分之一毫秒)和毫微秒(NANOSECONDS, 千分之一微秒)
runnableTaskQueue :用于保存等待执行的任务的阻塞队列。有5种可选择
ArrayBlockingQueue:是一个基于数组结构的有界阻塞队列,此队列按 FIFO(先进先出)原则对元素进行排序。
ThreadFactory :通过线程工厂给每个创建出来的线程设置名字,帮助Debug和定位问题。可以使用默认线程工厂Executors.defaultThreadFactory()
RejectedExecutionHandler :当队列和线程池都满了,说明线程池处于饱和状态,那么必须采取一种策略处理提交的新任务。这个策略默认情况下是AbortPolicy,表示无法处理新任务时抛出异常。jdk提供4种策略
ThreadPoolExecutor.AbortPolicy: 丢弃任务并抛出RejectedExecutionException异常(默认)
(3)示例
连接池配置类:ThreadPoolConfig
1 2 3 4 5 6 7 8 9 10 11 12 13 14 15 16 17 18 19 20 @Configuration public class ThreadPoolConfig @Bean(value = "myThreadPool") public ExecutorService buildMyThreadPool () ThreadFactory threadFactory = new ThreadFactoryBuilder().setNameFormat("my-thread-%d" ).build(); ExecutorService executorService = new ThreadPoolExecutor( 15 ,30 ,0 ,TimeUnit.MILLISECONDS ,new ArrayBlockingQueue<>(1000 ) ,threadFactory ,new ThreadPoolExecutor.CallerRunsPolicy() ); return executorService; } }
注入并使用
1 2 3 4 5 6 7 8 9 10 11 12 13 14 15 16 17 18 19 20 21 22 23 24 @RunWith(SpringRunner.class) @SpringBootTest(classes = Application.class) public class Test @Resource(name = "myThreadPool") private ExecutorService myThreadPool; @org .junit.Test public void test () for (int i = 0 ; i < 10 ; i++) { final int index = i; myThreadPool.execute(new Runnable() { @Override public void run () System.out.println("index: " +index); } }); } myThreadPool.shutdown(); } }
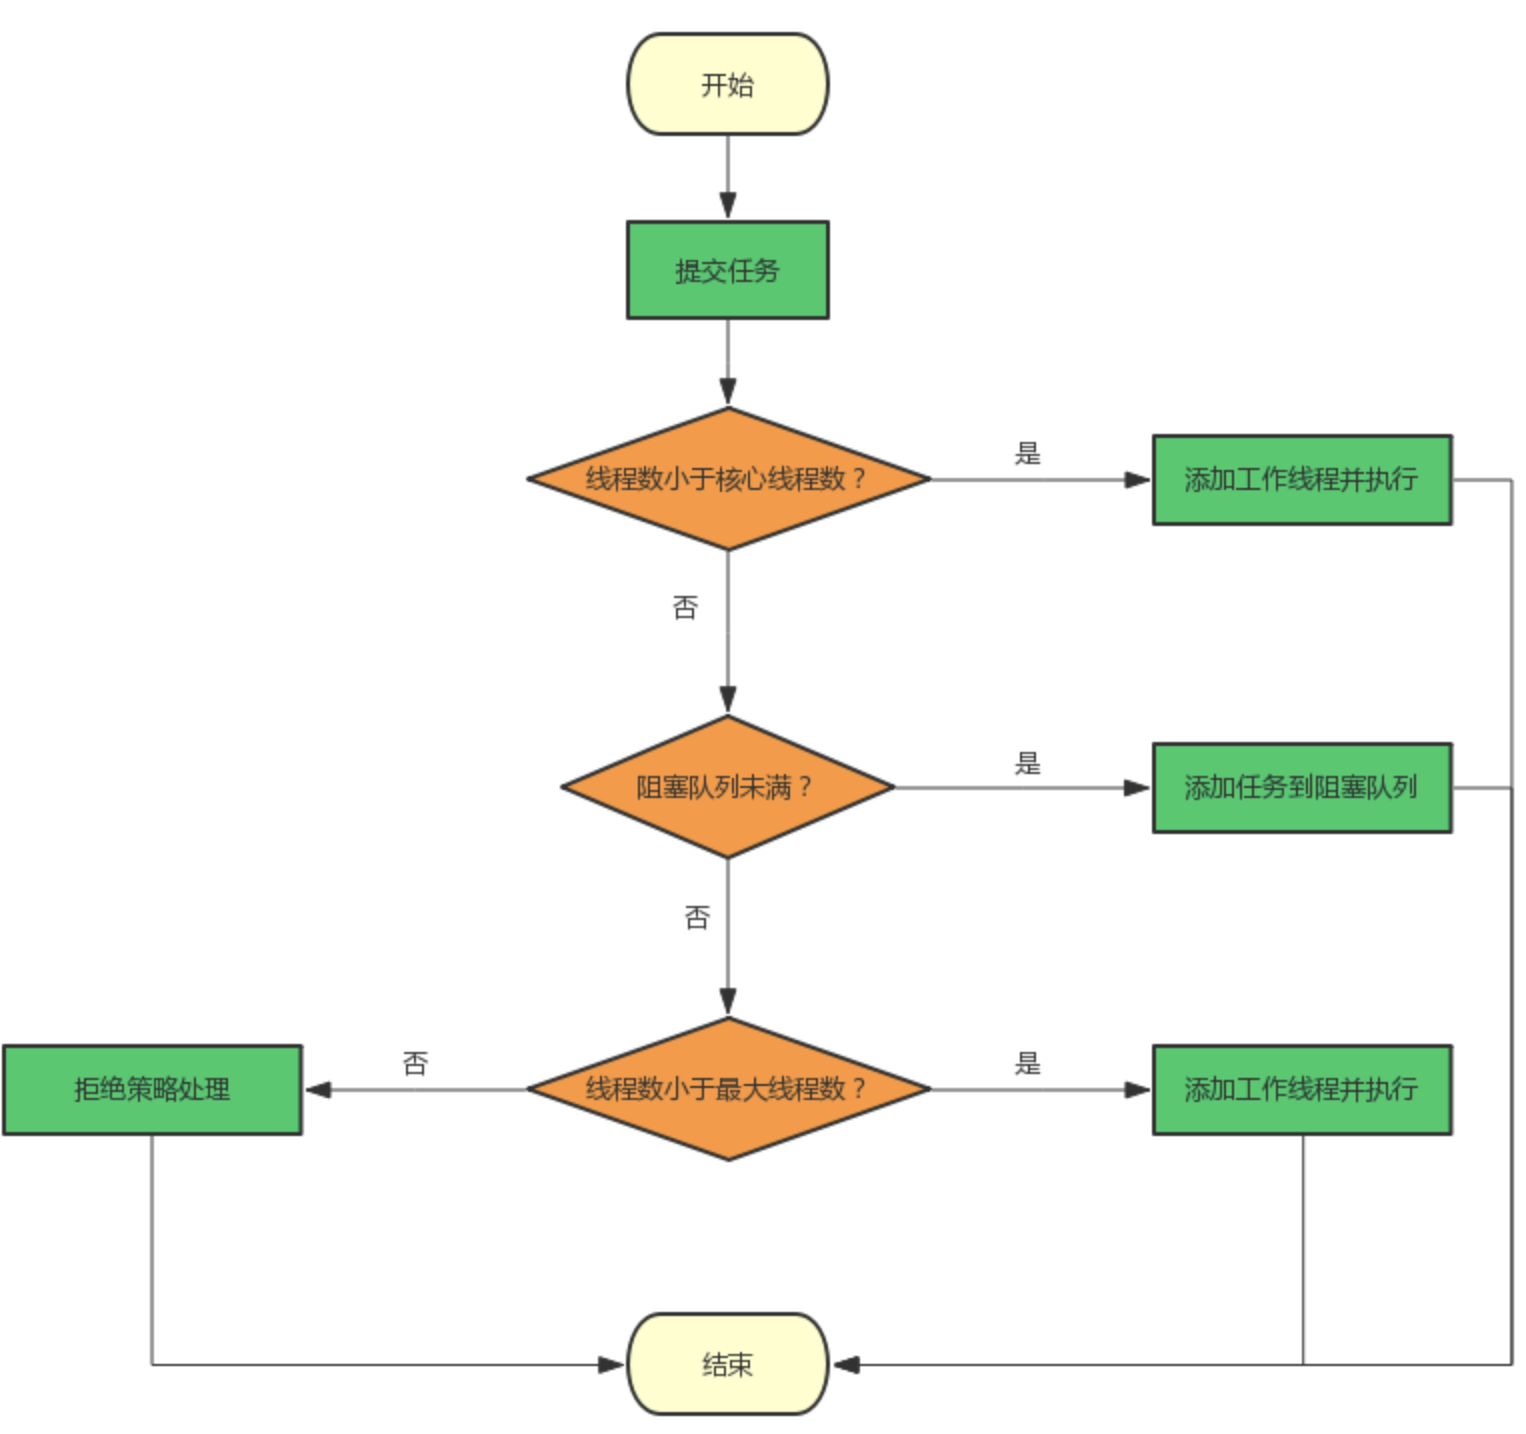
任务提交给线程池之后的处理策略(主要有4点)
如果当前线程池中的线程数目小于corePoolSize,则每来一个任务,就会创建一个线程去执行这个任务;
如果当前线程池中的线程数目>=corePoolSize,则每来一个任务,会尝试将其添加到任务缓存队列当中,若添加成功,则该任务会等待空闲线程将其取出去执行;若添加失败(一般来说是任务缓存队列已满),则会尝试创建新的线程去执行这个任务;
如果当前线程池中的线程数目达到maximumPoolSize,则会采取任务拒绝策略进行处理;
如果线程池中的线程数量大于 corePoolSize时,如果某线程空闲时间超过keepAliveTime,线程将被终止,直至线程池中的线程数目不大于corePoolSize;如果允许为核心池中的线程设置存活时间,那么核心池中的线程空闲时间超过keepAliveTime,线程也会被终止。
CompletableFuture 异步编排 runAsync 和 supplyAsync方法 CompletableFuture 提供了四个静态方法来创建一个异步操作:
1 2 3 4 public static CompletableFuture<Void> runAsync (Runnable runnable) public static CompletableFuture<Void> runAsync (Runnable runnable, Executor executor) public static <U> CompletableFuture<U> supplyAsync (Supplier<U> supplier) public static <U> CompletableFuture<U> supplyAsync (Supplier<U> supplier, Executor executor)
没有指定Executor的方法会使用ForkJoinPool.commonPool() 作为它的线程池执行异步代码。如果指定线程池,则使用指定的线程池运行。以下所有的方法都类同。
runAsync方法不支持返回值。
supplyAsync方法可以支持返回值。
runAsync方法示例:
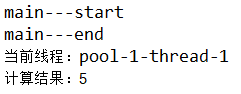
1 2 3 4 5 6 7 8 9 10 11 12 13 14 15 16 17 18 19 20 21 22 23 24 25 26 27 28 29 30 package com.xieh; import java.util.concurrent.CompletableFuture;import java.util.concurrent.ExecutionException;import java.util.concurrent.ExecutorService;import java.util.concurrent.Executors;import java.util.concurrent.LinkedBlockingDeque;import java.util.concurrent.ThreadPoolExecutor;import java.util.concurrent.TimeUnit; public class CompletableFutureTest public static ExecutorService executorService = new ThreadPoolExecutor(5 , 100 , 3L , TimeUnit.SECONDS, new LinkedBlockingDeque<Runnable>(1000 ), Executors.defaultThreadFactory(), new ThreadPoolExecutor.AbortPolicy()); public static void main (String[] args) throws InterruptedException, ExecutionException System.out.println("main---start" ); CompletableFuture<Void> future = CompletableFuture.runAsync(() -> { System.out.println("当前线程:" + Thread.currentThread().getName()); int i = 10 / 2 ; System.out.println("计算结果:" + i); }, executorService); System.out.println("main---end" ); executorService.shutdown(); } }
supplyAsync方法示例:
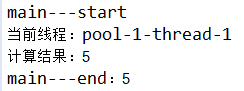
1 2 3 4 5 6 7 8 9 10 11 12 13 14 15 16 17 18 19 20 21 22 public class CompletableFutureTest public static ExecutorService executorService = new ThreadPoolExecutor(5 , 100 , 3L , TimeUnit.SECONDS, new LinkedBlockingDeque<Runnable>(1000 ), Executors.defaultThreadFactory(), new ThreadPoolExecutor.AbortPolicy()); public static void main (String[] args) throws InterruptedException, ExecutionException System.out.println("main---start" ); CompletableFuture<Integer> future = CompletableFuture.supplyAsync(() -> { System.out.println("当前线程:" + Thread.currentThread().getName()); int i = 10 / 2 ; System.out.println("计算结果:" + i); return i; }, executorService); Integer integer = future.get(); System.out.println("main---end:" + integer); executorService.shutdown(); } }
计算结果完成时的回调方法 当CompletableFuture的计算结果完成,或者抛出异常的时候,可以执行特定的Action。主要是下面的方法:
1 2 3 4 public CompletableFuture<T> whenComplete (BiConsumer<? super T,? super Throwable> action) public CompletableFuture<T> whenCompleteAsync (BiConsumer<? super T,? super Throwable> action) public CompletableFuture<T> whenCompleteAsync (BiConsumer<? super T,? super Throwable> action, Executor executor) public CompletableFuture<T> exceptionally (Function<Throwable,? extends T> fn)
可以看到Action的类型是BiConsumer<? super T,? super Throwable>它可以处理正常的计算结果,或者异常情况。
whenComplete 和 whenCompleteAsync 的区别 :
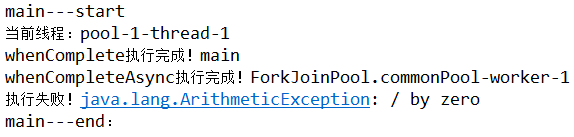
runAsync方法计算结果完成时的后续操作示例 :
1 2 3 4 5 6 7 8 9 10 11 12 13 14 15 16 17 18 19 20 21 22 23 24 25 26 27 28 29 30 31 32 33 34 35 36 37 38 39 40 41 42 43 44 45 46 public class CompletableFutureTest public static ExecutorService executorService = new ThreadPoolExecutor(5 , 100 , 3L , TimeUnit.SECONDS, new LinkedBlockingDeque<Runnable>(1000 ), Executors.defaultThreadFactory(), new ThreadPoolExecutor.AbortPolicy()); public static void main (String[] args) throws InterruptedException, ExecutionException System.out.println("main---start" ); CompletableFuture<Void> future = CompletableFuture.runAsync(() -> { System.out.println("当前线程:" + Thread.currentThread().getName()); int i = 10 / 0 ; System.out.println("计算结果:" + i); }, executorService); future.whenComplete(new BiConsumer<Void, Throwable>() { @Override public void accept (Void t, Throwable action) System.out.println("whenComplete执行完成!" + Thread.currentThread().getName()); } }); future.whenCompleteAsync(new BiConsumer<Void, Throwable>() { @Override public void accept (Void t, Throwable action) System.out.println("whenCompleteAsync执行完成!" + Thread.currentThread().getName()); } }); future.exceptionally(new Function<Throwable, Void>() { @Override public Void apply (Throwable t) System.out.println("执行失败!" + t.getMessage()); return null ; } }); System.out.println("main---end:" ); executorService.shutdown(); } }
supplyAsync方法计算结果完成时的后续操作示例 :
1 2 3 4 5 6 7 8 9 10 11 12 13 14 15 16 17 18 19 20 21 22 23 24 25 26 27 28 public class CompletableFutureTest public static ExecutorService executorService = new ThreadPoolExecutor(5 , 100 , 3L , TimeUnit.SECONDS, new LinkedBlockingDeque<Runnable>(1000 ), Executors.defaultThreadFactory(), new ThreadPoolExecutor.AbortPolicy()); public static void main (String[] args) throws InterruptedException, ExecutionException System.out.println("main---start" ); CompletableFuture<Integer> future = CompletableFuture.supplyAsync(() -> { System.out.println("当前线程:" + Thread.currentThread().getName()); int i = 10 / 0 ; System.out.println("计算结果:" + i); return i; }, executorService).whenComplete((result, exception) -> { System.out.println("whenComplete异步任务完成了,结果是:" + result + ";异常是:" + exception); }).whenCompleteAsync((result, exception) -> { System.out.println("whenCompleteAsync异步任务完成了,结果是:" + result + ";异常是:" + exception); }).exceptionally(throwable -> { return 10 ; }); Integer integer = future.get(); System.out.println("main---end:" + integer); executorService.shutdown(); } }
handle 方法 handle 是执行任务完成时对结果的处理。
代码示例:
1 2 3 4 5 6 7 8 9 10 11 12 13 14 15 16 17 18 19 20 21 22 23 24 25 26 27 28 29 30 31 32 33 34 35 36 37 38 39 public class CompletableFutureTest public static ExecutorService executorService = new ThreadPoolExecutor(5 , 100 , 3L , TimeUnit.SECONDS, new LinkedBlockingDeque<Runnable>(1000 ), Executors.defaultThreadFactory(), new ThreadPoolExecutor.AbortPolicy()); public static void main (String[] args) throws InterruptedException, ExecutionException System.out.println("main---start" ); CompletableFuture<Integer> future = CompletableFuture.supplyAsync(() -> { System.out.println("当前线程:" + Thread.currentThread().getName()); int i = 10 / 0 ; System.out.println("计算结果:" + i); return i; }, executorService).whenComplete((result, exception) -> { System.out.println("whenComplete异步任务完成了,结果是:" + result + ";异常是:" + exception); }).whenCompleteAsync((result, exception) -> { System.out.println("whenCompleteAsync异步任务完成了,结果是:" + result + ";异常是:" + exception); }).handle((result, throwable) -> { if (result != null ) { return result * 2 ; } if (throwable != null ) { return 1 ; } return 0 ; }).exceptionally(throwable -> { return 10 ; }); Integer integer = future.get(); System.out.println("main---end:" + integer); executorService.shutdown(); } }
线程串行化
thenApply 方法:当一个线程依赖另一个线程时,可以使用 thenApply 方法来把这两个线程串行化。获取上一个任务返回的结果,并返回当前任务的返回值
thenAccept 消费处理结果:接收任务的处理结果,并消费处理,无返回结果。
thenRun 方法:跟 thenAccept 方法不一样的是,不关心任务的处理结果。只要上面的任务执行完成,就开始执行 thenRun 。
1 2 3 4 5 6 7 8 9 10 11 public <U> CompletableFuture<U> thenApply (Function<? super T,? extends U> fn) public <U> CompletableFuture<U> thenApplyAsync (Function<? super T,? extends U> fn) public <U> CompletableFuture<U> thenApplyAsync (Function<? super T,? extends U> fn, Executor executor) public CompletionStage<Void> thenAccept (Consumer<? super T> action) public CompletionStage<Void> thenAcceptAsync (Consumer<? super T> action) public CompletionStage<Void> thenAcceptAsync (Consumer<? super T> action,Executor executor) public CompletionStage<Void> thenRun (Runnable action) public CompletionStage<Void> thenRunAsync (Runnable action) public CompletionStage<Void> thenRunAsync (Runnable action,Executor executor)
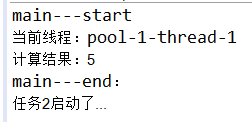
thenRun代码示例 1 2 3 4 5 6 7 8 9 10 11 12 13 14 15 16 17 18 19 20 21 22 public class CompletableFutureTest public static ExecutorService executorService = new ThreadPoolExecutor(5 , 100 , 3L , TimeUnit.SECONDS, new LinkedBlockingDeque<Runnable>(1000 ), Executors.defaultThreadFactory(), new ThreadPoolExecutor.AbortPolicy()); public static void main (String[] args) throws InterruptedException, ExecutionException System.out.println("main---start" ); CompletableFuture<Void> future = CompletableFuture.supplyAsync(() -> { System.out.println("当前线程:" + Thread.currentThread().getName()); int i = 10 / 2 ; System.out.println("计算结果:" + i); return i; }, executorService).thenRunAsync(() -> { System.out.println("任务2启动了..." ); }, executorService); System.out.println("main---end:" ); executorService.shutdown(); } }
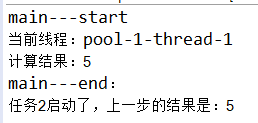
thenAccept代码示例 1 2 3 4 5 6 7 8 9 10 11 12 13 14 15 16 17 18 19 20 21 22 public class CompletableFutureTest public static ExecutorService executorService = new ThreadPoolExecutor(5 , 100 , 3L , TimeUnit.SECONDS, new LinkedBlockingDeque<Runnable>(1000 ), Executors.defaultThreadFactory(), new ThreadPoolExecutor.AbortPolicy()); public static void main (String[] args) throws InterruptedException, ExecutionException System.out.println("main---start" ); CompletableFuture<Void> future = CompletableFuture.supplyAsync(() -> { System.out.println("当前线程:" + Thread.currentThread().getName()); int i = 10 / 2 ; System.out.println("计算结果:" + i); return i; }, executorService).thenAcceptAsync((result) -> { System.out.println("任务2启动了,上一步的结果是:" + result); }, executorService); System.out.println("main---end:" ); executorService.shutdown(); } }
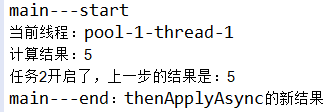
thenApply代码示例 1 2 3 4 5 6 7 8 9 10 11 12 13 14 15 16 17 18 19 20 21 22 23 24 public class CompletableFutureTest public static ExecutorService executorService = new ThreadPoolExecutor(5 , 100 , 3L , TimeUnit.SECONDS, new LinkedBlockingDeque<Runnable>(1000 ), Executors.defaultThreadFactory(), new ThreadPoolExecutor.AbortPolicy()); public static void main (String[] args) throws InterruptedException, ExecutionException System.out.println("main---start" ); CompletableFuture<String> future = CompletableFuture.supplyAsync(() -> { System.out.println("当前线程:" + Thread.currentThread().getName()); int i = 10 / 2 ; System.out.println("计算结果:" + i); return i; }, executorService).thenApplyAsync(result -> { System.out.println("任务2开启了,上一步的结果是:" + result); return "thenApplyAsync的新结果" ; }, executorService); String string = future.get(); System.out.println("main---end:" + string); executorService.shutdown(); } }
任务合并
thenCombine:thenCombine 会把 两个 CompletionStage 的任务都执行完成后,把两个任务的结果一块交给 thenCombine 来处理。
thenAcceptBoth:当两个CompletionStage都执行完成后,把结果一块交给thenAcceptBoth来进行消耗。
thenCompose:thenCompose 方法允许你对两个 CompletionStage 进行流水线操作,第一个操作完成时,将其结果作为参数传递给第二个操作。
applyToEither:两个CompletionStage,谁执行返回的结果快,我就用那个CompletionStage的结果进行下一步的转化操作。
acceptEither:两个CompletionStage,谁执行返回的结果快,我就用那个CompletionStage的结果进行下一步的消耗操作。
runAfterEither:两个CompletionStage,任何一个完成了都会执行下一步的操作(Runnable)。
runAfterBoth:两个CompletionStage,都完成了计算才会执行下一步的操作(Runnable)。
1 2 3 4 5 6 7 8 9 10 11 12 13 14 15 16 17 18 19 20 21 22 23 24 25 26 27 public <U,V> CompletionStage<V> thenCombine (CompletionStage<? extends U> other,BiFunction<? super T,? super U,? extends V> fn) ;public <U,V> CompletionStage<V> thenCombineAsync (CompletionStage<? extends U> other,BiFunction<? super T,? super U,? extends V> fn) ;public <U,V> CompletionStage<V> thenCombineAsync (CompletionStage<? extends U> other,BiFunction<? super T,? super U,? extends V> fn,Executor executor) ;public <U> CompletionStage<Void> thenAcceptBoth (CompletionStage<? extends U> other,BiConsumer<? super T, ? super U> action) ;public <U> CompletionStage<Void> thenAcceptBothAsync (CompletionStage<? extends U> other,BiConsumer<? super T, ? super U> action) ;public <U> CompletionStage<Void> thenAcceptBothAsync (CompletionStage<? extends U> other,BiConsumer<? super T, ? super U> action, Executor executor) ;public <U> CompletableFuture<U> thenCompose (Function<? super T, ? extends CompletionStage<U>> fn) ;public <U> CompletableFuture<U> thenComposeAsync (Function<? super T, ? extends CompletionStage<U>> fn) ;public <U> CompletableFuture<U> thenComposeAsync (Function<? super T, ? extends CompletionStage<U>> fn, Executor executor) ;public <U> CompletionStage<U> applyToEither (CompletionStage<? extends T> other,Function<? super T, U> fn) ;public <U> CompletionStage<U> applyToEitherAsync (CompletionStage<? extends T> other,Function<? super T, U> fn) ;public <U> CompletionStage<U> applyToEitherAsync (CompletionStage<? extends T> other,Function<? super T, U> fn,Executor executor) ;public CompletionStage<Void> acceptEither (CompletionStage<? extends T> other,Consumer<? super T> action) public CompletionStage<Void> acceptEitherAsync (CompletionStage<? extends T> other,Consumer<? super T> action) public CompletionStage<Void> acceptEitherAsync (CompletionStage<? extends T> other,Consumer<? super T> action,Executor executor) public CompletionStage<Void> runAfterEither (CompletionStage<?> other,Runnable action) public CompletionStage<Void> runAfterEitherAsync (CompletionStage<?> other,Runnable action) public CompletionStage<Void> runAfterEitherAsync (CompletionStage<?> other,Runnable action,Executor executor) public CompletionStage<Void> runAfterBoth (CompletionStage<?> other,Runnable action) public CompletionStage<Void> runAfterBothAsync (CompletionStage<?> other,Runnable action) public CompletionStage<Void> runAfterBothAsync (CompletionStage<?> other,Runnable action,Executor executor)
thenCombine代码示例 1 2 3 4 5 6 7 8 9 10 11 12 13 14 15 16 17 18 19 20 21 private static void thenCombine () throws Exception CompletableFuture<String> future1 = CompletableFuture.supplyAsync(new Supplier<String>() { @Override public String get () return "hello" ; } }); CompletableFuture<String> future2 = CompletableFuture.supplyAsync(new Supplier<String>() { @Override public String get () return "hello" ; } }); CompletableFuture<String> result = future1.thenCombine(future2, new BiFunction<String, String, String>() { @Override public String apply (String t, String u) return t+" " +u; } }); System.out.println(result.get()); }
thenAcceptBoth代码示例 1 2 3 4 5 6 7 8 9 10 11 12 13 14 15 16 17 18 19 20 21 22 23 24 25 26 27 28 29 30 31 32 33 34 35 36 private static void thenAcceptBoth () throws Exception CompletableFuture<Integer> f1 = CompletableFuture.supplyAsync(new Supplier<Integer>() { @Override public Integer get () int t = new Random().nextInt(3 ); try { TimeUnit.SECONDS.sleep(t); } catch (InterruptedException e) { e.printStackTrace(); } System.out.println("f1=" +t); return t; } }); CompletableFuture<Integer> f2 = CompletableFuture.supplyAsync(new Supplier<Integer>() { @Override public Integer get () int t = new Random().nextInt(3 ); try { TimeUnit.SECONDS.sleep(t); } catch (InterruptedException e) { e.printStackTrace(); } System.out.println("f2=" +t); return t; } }); f1.thenAcceptBoth(f2, new BiConsumer<Integer, Integer>() { @Override public void accept (Integer t, Integer u) System.out.println("f1=" +t+";f2=" +u+";" ); } }); }
thenCompose代码示例 1 2 3 4 5 6 7 8 9 10 11 12 13 14 15 16 17 18 19 20 21 22 23 24 private static void thenCompose () throws Exception CompletableFuture<Integer> f = CompletableFuture.supplyAsync(new Supplier<Integer>() { @Override public Integer get () int t = new Random().nextInt(3 ); System.out.println("t1=" +t); return t; } }).thenCompose(new Function<Integer, CompletionStage<Integer>>() { @Override public CompletionStage<Integer> apply (Integer param) return CompletableFuture.supplyAsync(new Supplier<Integer>() { @Override public Integer get () int t = param *2 ; System.out.println("t2=" +t); return t; } }); } }); System.out.println("thenCompose result : " +f.get()); }
applyToEither 代码示例 1 2 3 4 5 6 7 8 9 10 11 12 13 14 15 16 17 18 19 20 21 22 23 24 25 26 27 28 29 30 31 32 33 34 35 36 37 38 39 private static void applyToEither () throws Exception CompletableFuture<Integer> f1 = CompletableFuture.supplyAsync(new Supplier<Integer>() { @Override public Integer get () int t = new Random().nextInt(3 ); try { TimeUnit.SECONDS.sleep(t); } catch (InterruptedException e) { e.printStackTrace(); } System.out.println("f1=" +t); return t; } }); CompletableFuture<Integer> f2 = CompletableFuture.supplyAsync(new Supplier<Integer>() { @Override public Integer get () int t = new Random().nextInt(3 ); try { TimeUnit.SECONDS.sleep(t); } catch (InterruptedException e) { e.printStackTrace(); } System.out.println("f2=" +t); return t; } }); CompletableFuture<Integer> result = f1.applyToEither(f2, new Function<Integer, Integer>() { @Override public Integer apply (Integer t) System.out.println(t); return t * 2 ; } }); System.out.println(result.get()); }
acceptEither代码示例 1 2 3 4 5 6 7 8 9 10 11 12 13 14 15 16 17 18 19 20 21 22 23 24 25 26 27 28 29 30 31 32 33 34 35 private static void acceptEither () throws Exception CompletableFuture<Integer> f1 = CompletableFuture.supplyAsync(new Supplier<Integer>() { @Override public Integer get () int t = new Random().nextInt(3 ); try { TimeUnit.SECONDS.sleep(t); } catch (InterruptedException e) { e.printStackTrace(); } System.out.println("f1=" +t); return t; } }); CompletableFuture<Integer> f2 = CompletableFuture.supplyAsync(new Supplier<Integer>() { @Override public Integer get () int t = new Random().nextInt(3 ); try { TimeUnit.SECONDS.sleep(t); } catch (InterruptedException e) { e.printStackTrace(); } System.out.println("f2=" +t); return t; } }); f1.acceptEither(f2, new Consumer<Integer>() { @Override public void accept (Integer t) System.out.println(t); } }); }
runAfterEither代码示例 1 2 3 4 5 6 7 8 9 10 11 12 13 14 15 16 17 18 19 20 21 22 23 24 25 26 27 28 29 30 31 32 33 34 35 36 private static void runAfterEither () throws Exception CompletableFuture<Integer> f1 = CompletableFuture.supplyAsync(new Supplier<Integer>() { @Override public Integer get () int t = new Random().nextInt(3 ); try { TimeUnit.SECONDS.sleep(t); } catch (InterruptedException e) { e.printStackTrace(); } System.out.println("f1=" +t); return t; } }); CompletableFuture<Integer> f2 = CompletableFuture.supplyAsync(new Supplier<Integer>() { @Override public Integer get () int t = new Random().nextInt(3 ); try { TimeUnit.SECONDS.sleep(t); } catch (InterruptedException e) { e.printStackTrace(); } System.out.println("f2=" +t); return t; } }); f1.runAfterEither(f2, new Runnable() { @Override public void run () System.out.println("上面有一个已经完成了。" ); } }); }
runAfterBoth代码示例 1 2 3 4 5 6 7 8 9 10 11 12 13 14 15 16 17 18 19 20 21 22 23 24 25 26 27 28 29 30 31 32 33 34 35 36 private static void runAfterBoth () throws Exception CompletableFuture<Integer> f1 = CompletableFuture.supplyAsync(new Supplier<Integer>() { @Override public Integer get () int t = new Random().nextInt(3 ); try { TimeUnit.SECONDS.sleep(t); } catch (InterruptedException e) { e.printStackTrace(); } System.out.println("f1=" +t); return t; } }); CompletableFuture<Integer> f2 = CompletableFuture.supplyAsync(new Supplier<Integer>() { @Override public Integer get () int t = new Random().nextInt(3 ); try { TimeUnit.SECONDS.sleep(t); } catch (InterruptedException e) { e.printStackTrace(); } System.out.println("f2=" +t); return t; } }); f1.runAfterBoth(f2, new Runnable() { @Override public void run () System.out.println("上面两个任务都执行完成了。" ); } }); }
allof代码示例 1 2 3 4 5 6 7 8 9 10 11 12 13 14 15 16 17 18 19 20 21 22 23 24 25 26 27 28 29 30 31 32 33 34 35 36 37 38 39 40 41 42 43 44 45 private void method () throws ExecutionException, InterruptedException CompletableFuture<String> f1 = CompletableFuture.supplyAsync(() -> { try { TimeUnit.SECONDS.sleep(3 ); } catch (InterruptedException e) { e.printStackTrace(); } return "f1" ; }); f1.whenCompleteAsync(new BiConsumer<String, Throwable>() { @Override public void accept (String s, Throwable throwable) System.out.println(System.currentTimeMillis() + ":" + s); } }); CompletableFuture<String> f2 = CompletableFuture.supplyAsync(() -> { try { TimeUnit.SECONDS.sleep(2 ); } catch (InterruptedException e) { e.printStackTrace(); } return "f2" ; }); f2.whenCompleteAsync(new BiConsumer<String, Throwable>() { @Override public void accept (String s, Throwable throwable) System.out.println(System.currentTimeMillis() + ":" + s); } }); CompletableFuture<Void> all = CompletableFuture.allOf(f1, f2); System.out.println(System.currentTimeMillis() + ":阻塞" ); all.join(); System.out.println(System.currentTimeMillis() + ":阻塞结束" ); System.out.println("任务均已完成。" ); }
输出:
1 2 3 4 5 06 -12 20 :16 :37.400 31142 -31142 /zhangphil.test I/System.out: 1528805797400 :阻塞06 -12 20 :16 :39.406 31142 -31171 /zhangphil.test I/System.out: 1528805799406 :f206 -12 20 :16 :40.404 31142 -31170 /zhangphil.test I/System.out: 1528805800404 :f106 -12 20 :16 :40.404 31142 -31142 /zhangphil.test I/System.out: 1528805800404 :阻塞结束 任务均已完成。
任务超时 JDK 9带来了两种新方法,可以为每个人提供渴望的功能 - 这对于确保在使用异步处理时的正确弹性至关重要。
orTimeout 简单地说,在调用上述方法之后,如果未在指定的超时内完成,将来会抛出ExecutionException。
一个简单的例子:
1 2 3 4 CompletableFuture<Integer> future = CompletableFuture.supplyAsync(this ::computeEndlessly) .orTimeout(1 , TimeUnit.SECONDS); future.get();
由于设置了timeout为1秒,那么在get那里等待1秒后抛错
completeOnTimeout 在这种情况下,我们可以在达到超时后返回默认值:
1
2
3
4
CompletableFuture<Integer> future = CompletableFuture.supplyAsync(this ::computeEndlessly) .completeOnTimeout(42 , 1 , TimeUnit.SECONDS); Integer result = future.get();
超时1秒后不是报错,而是返回了预设的42这个值,前提条件是你必须预设默认值。